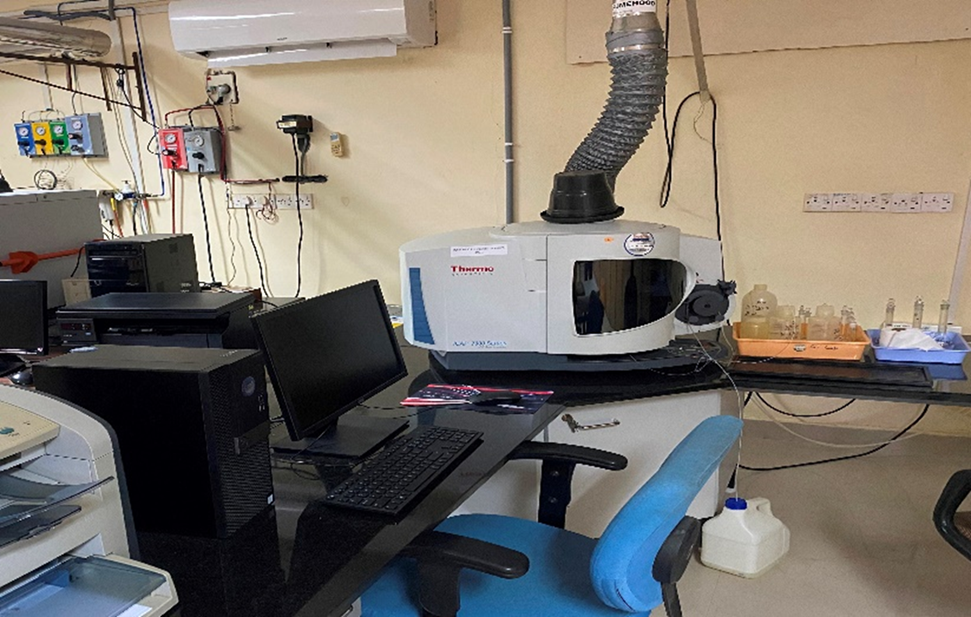
1. Purpose & Scope
The Standard Operating Procedure (SOP) describes the operation, calibration and quality control procedures for the Thermo Scientific iCAP 7000 ICP-OES equipped with Qtegra ISDS Software. The procedure is applicable to the multi-element analysis of environmental, soil, plant, water and other biological samples for quantitative determination of elemental concentrations.
2. Pre-Analysis System Startup:
-
Switch On the UPS to stabilize laboratory power backup lines.
-
Open the Argon gas cylinder and check the pressure gauge to ensure sufficient gas supply.
-
Switch On the ICP-OES instrument using the power switch located on the back side of the instrument.
-
Open the Gas Panel Valve on the gas distribution assembly. Ensure gas line delivery pressure reads approximately 0.6 MPa (87–90 psi).
-
Turn On the computer system and open Qtegra Software. Wait for software configuration with the ICP-OES instrument. The status indicator should turn Green (typically requires 15–30 minutes for optical purge/interlocks stabilization).
-
Switch On the Chiller first and wait for 5 minutes to stabilize the chiller temperature at 22°C. Immediately Switch On the Exhaust system.
-
Lock the peristaltic pump tubing (aqueous and drain tube) into place by adjusting the tension levers.
3. Method Configuration & Plasma Ignition:
-
Prepare the LabBook inside the Qtegra software. Select a pre-existing LabBook (validated method) or create a new LabBook. Click on LabBook → Select Existing Logbook or Create New LabBook → Click on Create Logbook → Click on Method Parameter → Click on Analytes → Select the elements required for analysis from the software periodic table.
-
Click on the Standard → Select the standard → Enter the standard value in the Description column.
-
Click on "Sample List" and prepare the sample list. Insert a check standard after every 20 samples to monitor and verify instrument drift stability. Follow the sample list sequence: Feed Blank (DW) → Feed Standards (5–6 standards) → Sample Blank → Sample List with Check Standard (after every 20 samples).
-
Ignite the Plasma by clicking on the “Get Ready” icon (circle symbol) in the Qtegra dashboard.
-
Allow the plasma to burn for 15 minutes to reach thermal equilibrium before running calibration and stabilizing the system.
-
Immerse the sample introduction aqueous pipeline into 2% HNO₃ (Nitric Acid) wash and Deionized Water (DDW) as guided by the software setup alerts.
-
Wait for the Qtegra dashboard to display the “Success” remark indicating that all interlocks and plasma conditions are stable.
4.Calibration & Sample Analysis:
-
Prior to initiating sample analysis, ensure that the blank (DDW), calibration standard, and sample solutions are correctly positioned within the sample tray.
-
To initiate the LabBook analysis sequence, click the green Run symbol (►) on the left side of the toolbar, followed by the matching green symbol (►) on the left side of the status bar.
-
Manually place the aqueous sample intake tube into the blank solution and start the sequence. The Qtegra software will prompt for each sample, executing a 3- to 4-minute analysis followed by a 30-second wash process. Run the calibration standards sequentially.
-
If the calibration curve is accepted, select and run the unknown samples according to the LabBook protocol.
-
Routinely check the Argon gas cylinder pressure gauge during analytical sequences. Keep a backup cylinder on standby.
5. Post-Analysis & System Shut Down:
-
Export the analysis data by navigating to the LabBook's report section to view the analysis report. Click on Horizontal Format and click the Save icon to store the report in HTML format.
-
Immerse the aqueous sample tube into Deionized Water (DW) and run the pump for 5 minutes to clear out acid and salt deposits from the spray chamber/nebulizer.
-
Remove the aqueous sample tube from the Deionized Water (DW) and place it into an empty bottle to dry the tube.
-
To stop the scheduled LabBook run, click the Stop symbol (▣) located on the left side of the status bar.
-
Extinguish the plasma by clicking the Plasma Off option in Qtegra.
-
Open the pressure bars on the peristaltic pump to release the tubing.
-
Turn off the Argon gas supply at the main cylinder valve. Turn off the Chiller first, then turn off the Exhaust system.
-
Close the Qtegra software and shut down the computer system.
-
Turn off the ICP-OES instrument switch. Lastly, turn off the UPS system.